Photo: Solen Roth
Stamp making and printing
PROJECT | TAPISKWAN
OBJECTIVES
By exploring different materials to make stamps and printing on various types of paper, the goal is to encourage the youth to explore their creativity in a medium that is versatile and shows quick results.
NEEDS
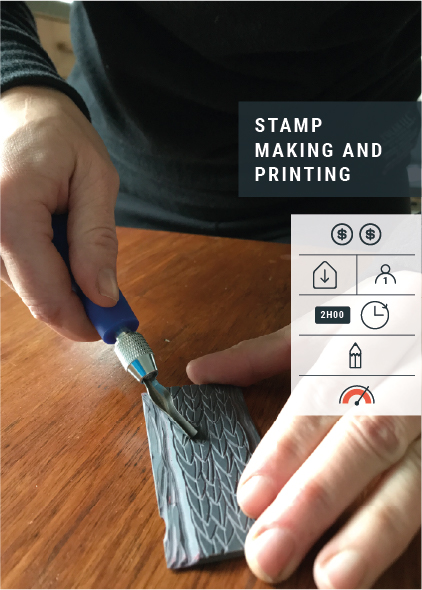
Stamps: tracing paper, pencils, pens, sharpies, exacto knives and (a) flat cardboard (ex. boxes), sheet craft foam, glue, and scissors or (b) Linoleum sheets and cutting tools.
Printing: an ink applicator or stiff roller, thick paper or cardboard, printing ink (if unavailable, acrylic paint can also be used, but the outcome will be less sharp), and small foam rollers. This activity can be done lower-cost with recycled materials, or higher-cost, with materials purchased in a store.
Optional: frames for final prints, or ready-made paper items (ex. cards, or notebooks).
A large room with big tables, including clean areas to let the final prints dry, and access to a sink and cleaning products.
STEPS
1. Choose a simple shape or design to make into a stamp. These can be selected from images used or designs developed in a previous activity (e.g. "Hunting for inspiration" or "Personal logo design") — 15 min
2. With the help of tracing paper, transpose the design onto craft sheet foam or a linoleum sheet. Retrace the design with a sharpie or pen to make it more visible — 15 min
3. Cut the shapes out from the sheet of foam and glue them on a piece of thick flat cardboard, or carve them into the linoleum. Test the stamp with ink or paint on a piece of draft paper, and adjust if needed — 30 min
4. Once the stamps are ready, explore various combinations and repetitions of stamp designs on draft paper. Participants can also share their stamps with one another to increase the creative possibilities — 60 min
5. After some practice, favorite designs can be printed on quality paper for framing, or on ready-made paper items like cards or notebooks — 60 min